
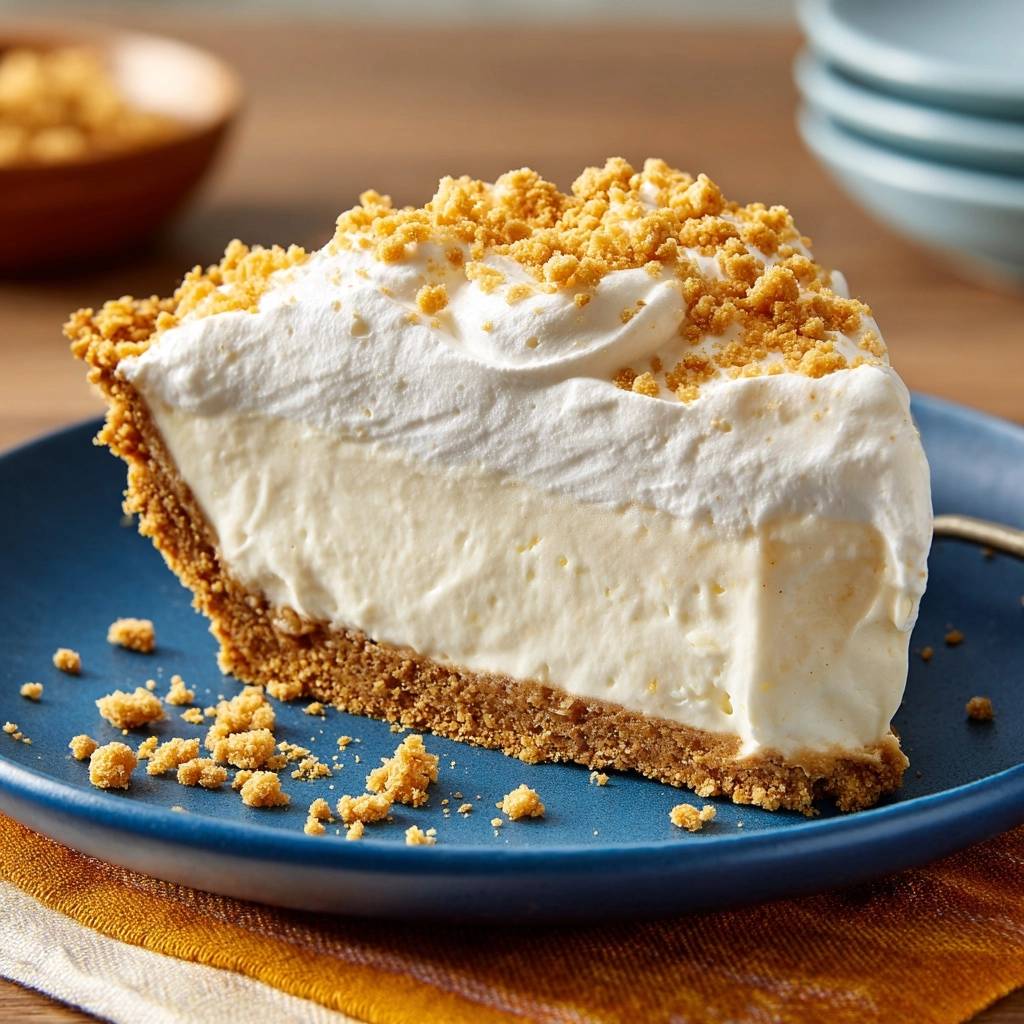
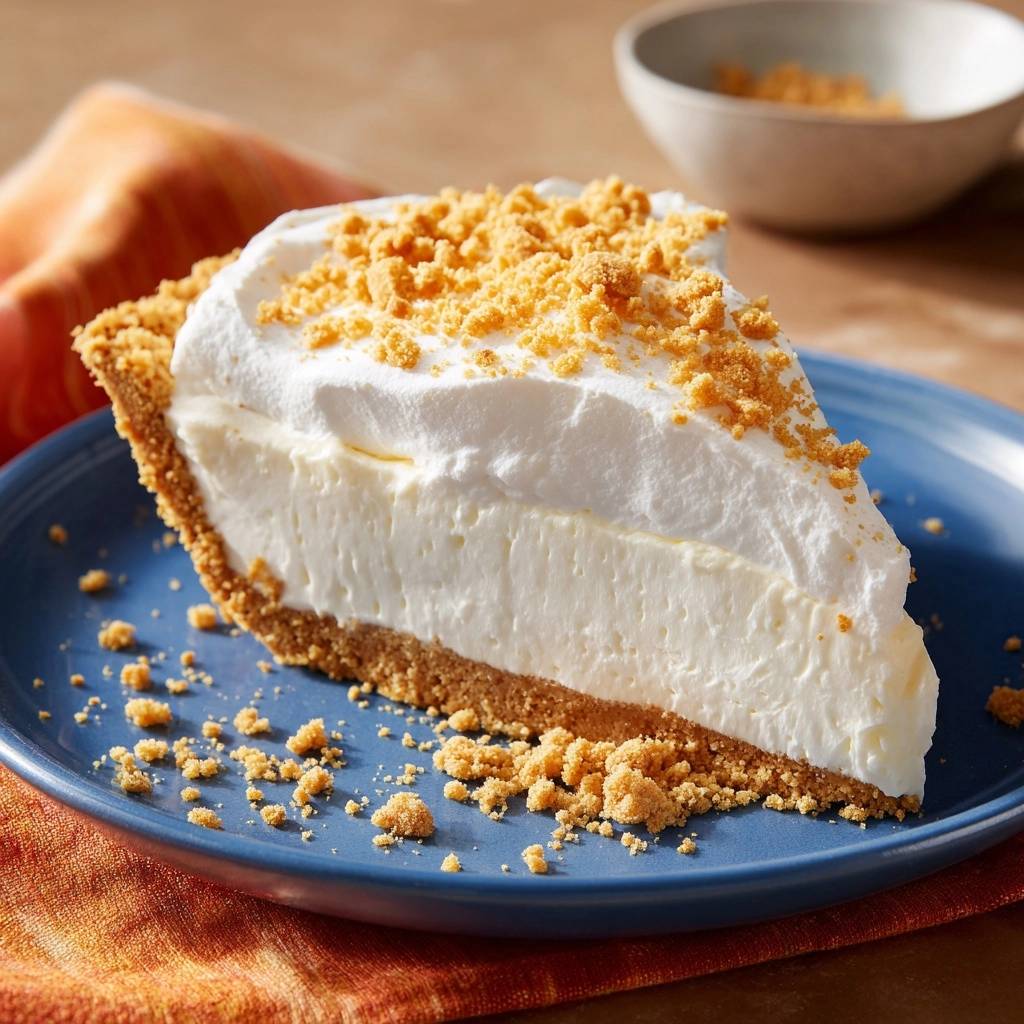
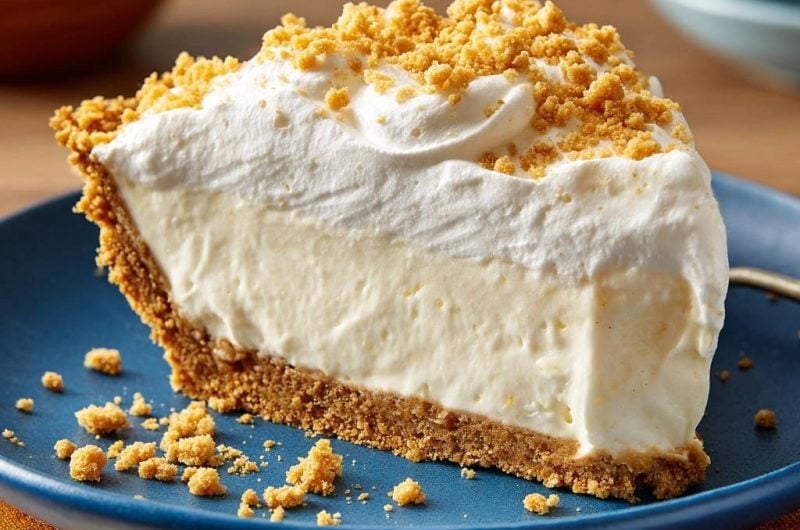
Creamy Lemon Pie with Crisp Graham Crust
Ever bite into a no-bake creamy lemon pie only to hit that dreaded soggy crust? It happens all the time, and it kills the whole dessert. But this creamy lemon pie flips the script with a quick pre-bake that keeps the graham crust crisp for days.
Here’s why it works so well. The wet filling from lemon juice and condensed milk soaks raw crusts, turning them mushy. Pre-baking seals it tight. Plus, that tangy creamy lemon pie filling cuts through the sweet crust perfectly for summer gatherings.
The real secret? Bake at 350°F for exactly 10 minutes. It gelatinizes the starches without over-browning, creating an unbreakable moisture barrier. You’ll get that satisfying crunch with every creamy bite.
Why Pre-Bake Stops Soggy Crusts
Moisture migration ruins most creamy lemon pies. The acidic lemon juice and condensed milk dissolve the butter binders in raw graham crusts. Therefore, pre-baking at 350°F transforms the starches. They gelatinize and seal the pores tight.
Without this step, sogginess sets in fast. However, a quick bake creates a sturdy base. It holds up even after days in the fridge. That’s the difference between flop and perfection.
Picture a blind-baked crust next to a raw one. The baked version stays golden and firm. Raw? It turns to mush under the filling. Science backs this every time.
Graham Crumb Binding Mechanics
The 1 1/2 cups crumbs need 6 tablespoons melted unsalted butter. This fat coats each particle evenly. In addition, 2 tablespoons sugar binds it all without sogginess.
Too little butter, and it crumbles. Too much leads to greasiness. This ratio hits perfect cohesion.
10-Minute Bake Timing Precision
Exactly 10 minutes at 350°F sets the crust just right. Underbake, and it stays vulnerable. Overbake, and bitterness creeps in.
Check edges with a thermometer around 300°F internally. Rotate halfway for even doneness. Cool fully to stop carryover cooking.
Gathering Ingredients for Creamy Lemon Pie
Start with room-temperature 8 ounces cream cheese. It beats smooth without lumps. Fresh lemons give 1/2 cup juice and 1 tablespoon zest, way brighter than bottled.
One 14-ounce can sweetened condensed milk brings sweetness and creaminess. Use cold 1 cup heavy whipping cream for stable whipped topping. Unsalted butter keeps salt levels controlled.
Per slice, it’s about 450 calories, mostly from cream and condensed milk. Go for full-fat store brands if you’re pinching pennies, but premium shines brighter.
Cream Cheese and Condensed Milk Duo
Full-fat 8 ounces cream cheese emulsifies perfectly with 14 ounces condensed milk. The fats and sugars create a thick, velvety base. Low-fat versions separate easily.
Beat gradually to avoid curds. This duo sets the creamy lemon pie’s signature texture.
Fresh Lemon Zest and Juice Role
1/2 cup fresh juice plus 1 tablespoon zest delivers citric acid punch. It coagulates proteins for no-bake thickness. Zest the yellow part only to skip bitter pith.
Taste as you go. Bottled juice lacks potency and freshness.
Building the Crisp Graham Crust Base
Mix crumbs, butter, and sugar until it looks like wet sand. Press into a 9-inch pie plate with even 1/4-inch sides. Bake 10 minutes till golden.
Cool on a rack to halt cooking. This prevents warping. Now it’s ready for filling without sogginess.
Pro tip: Use a measuring cup to press firmly. It gives uniform density better than fingers.
Mixing Crumbs with Melted Butter
Combine in a bowl with a fork. Stir till moist but not overmixed. Wet sand texture holds shape perfectly.
Avoid clumping. Even coating prevents weak spots.
Pressing into 9-Inch Pie Plate
Press bottom flat with a glass. Tamp sides with fingers for height. Aim for even thickness everywhere.
This ensures no thin cracks later. Uniformity is key.
Baking for Moisture Barrier
Middle oven rack, rotate at 5 minutes. Bake till edges firm up. Cool 30 minutes minimum.
Smell that toasty aroma? That’s your sogginess shield forming.
Whipping Up Lemon Cream Filling
Beat cream cheese smooth first. Add condensed milk slowly till creamy. Stir in lemon juice and zest; watch it thicken instantly.
Pour into cooled crust gently. Chill 4 hours minimum. The pH drop from acid sets it firm without heat.
Troubleshoot lumps by using room-temp cheese. No air bubbles means clean slices.
Beating Cream Cheese Smooth
Use paddle attachment on medium 2-3 minutes. Scrape sides often. It should look silky before adding milk.
Cold cheese stays grainy. Patience pays off here.
Incorporating Lemon for Thickness
Mix juice and zest last. You’ll see it thicken as acid hits proteins. Taste for tang-sweet balance.
Don’t skip zest. It boosts flavor big time.
Topping with Stable Whipped Cream
Chill bowl and beaters first. Whip cold heavy cream with 2 tablespoons powdered sugar to stiff peaks. Spread to seal edges.
This traps moisture in. Keeps crust crisp longer. Optional: a touch of vanilla for depth.
Toasting Crunchy Graham Topping
Heat 1/2 cup crumbs in dry skillet medium, stir constantly 2-3 minutes. They’ll turn golden and nutty.
Cool fully before sprinkling. This adds crunch that doesn’t wilt.
Science of Creamy Lemon Pie Texture
Cream cheese proteins tangle with condensed milk sugars. Lemon acid coagulates them into a set filling. No bake needed.
Whipped cream adds air for lightness. At the crust interface, the barrier holds firm. Enjoy crispness up to 5 days.
Pro tip: Powdered sugar’s cornstarch stabilizes whips. It prevents weeping over time.
Acid Thickening Without Heat
Citric acid forms curds like cheesemaking. Better than gelatin for natural set. Filling firms in hours.
Too much acid? It gets rubbery. Balance is everything.
Whipped Cream Stability Factors
Cold cream whips highest. Powdered sugar cornstarch absorbs liquid. Overwhip to butter, and it’s ruined.
Stop at stiff peaks for spreadable perfection.
Avoiding Creamy Lemon Pie Pitfalls
Soggy crust? Always pre-bake. Runny filling means insufficient chill or warm cheese. Grainy texture from skipping smooth beating.
Dull lemon? Use fresh. Overpressed crust crumbles at edges. Fix with gentle tamping.
Visual check: Filling should mound slightly before chilling. Crust golden, not dark.
Fixing Runny Lemon Filling
Chill longer, up to overnight. Warm cream cheese fails to emulsify. Start over if needed.
Acid sets it cold. Patience fixes most issues.
Preventing Crust Edge Crumbles
Don’t overpress sides. Light tamping keeps it tender. Chill before filling if worried.
Even pressure avoids dense cracks.
Flavor Twists on Creamy Lemon Pie
Swap for lime: same 1/2 cup juice, brighter tang. Add raspberry puree swirled in filling. Coconut in crust for tropical vibe.
Dairy-free? Aquafaba whips stable. Scale down for mini pies in muffin tins.
Orange zest twist mellows acidity. Experiment small first.
Citrus Swaps Beyond Lemon
Lime: 1/2 cup juice, 1 tablespoon zest. Orange: reduce to 1/3 cup for less tart. Adjust sugar if needed.
Fresh always wins over bottled.
Adding Fruits or Extracts
Blend 1/2 cup raspberries, swirl half in filling. Almond extract dash in whip. Fold gently to keep layers.
Berries boost without sogginess.
Pairing Sides with Creamy Lemon Pie
Fresh berries cut richness. Shortbread cookies echo graham crunch. Seasonal fruit salad refreshes.
Keep sides light. Nothing heavy competes.
Best Beverages for Balance
Iced mint tea cools the tang. Sparkling water with lemon slices matches vibes. Both cleanse the palate clean.
Storage and Make-Ahead Strategies
Fridge in airtight cover up to 5 days. Crust stays crisp thanks to the bake. Portion slices for easy grabs.
Freeze whole up to 1 month: wrap unwrapped first, then foil. Thaw overnight in fridge.
Freezing Whole Creamy Lemon Pie
Whipped cream freezes fine but softens on thaw. Add fresh post-thaw if crispness matters. Crust holds up great.
Creamy Lemon Pie FAQ
Can I Use Low-Fat Ingredients?
Low-fat cream cheese or cream leads to runny, separated filling. Full-fat ensures creamy texture and proper set. Stick to originals for best results.
How Long Does It Last?
Store covered in fridge up to 5 days; crust stays crisp. Freeze up to 1 month, thaw in fridge overnight. Don’t refreeze thawed pie.
Gluten-Free Crust Option?
Use 1 1/2 cups gluten-free graham-style crumbs or almond flour mix. Same butter and sugar. Pre-bake as directed for crispness.
Why Pre-Bake the Crust?
Pre-baking seals starches against lemon juice moisture. Raw crusts turn soggy fast. 10 minutes guarantees crunch for days.
Vegetarian or Vegan Versions?
Vegetarian fine as is. Vegan: cashew cream for cheese, coconut condensed milk, aquafaba for whip. Crust stays the same.
Creamy Lemon Pie
Course: DessertCuisine: AmericanDifficulty: easy8
servings20
minutes13
minutes240
Minutes450
kcalAmerican
Ingredients
1 1/2 cups graham cracker crumbs
6 tablespoons unsalted butter, melted
2 tablespoons granulated sugar
8 ounces cream cheese, softened
1 can (14 ounces) sweetened condensed milk
1/2 cup fresh lemon juice
1 tablespoon lemon zest
1 cup heavy whipping cream, cold
2 tablespoons powdered sugar
1/2 cup graham cracker crumbs, toasted for topping
Directions
- Preheat oven to 350 degrees F. Mix 1 1/2 cups graham cracker crumbs, melted butter, and 2 tablespoons sugar in a bowl until it resembles wet sand. Press firmly into a 9-inch pie plate, covering bottom and sides evenly. Bake for 10 minutes until lightly golden and set. This quick pre-bake creates a moisture barrier that prevents the crust from ever getting soggy, even after chilling with the wet filling. Cool completely.
- In a large bowl, beat softened cream cheese until smooth. Gradually add sweetened condensed milk, beating until creamy. Mix in lemon juice and zest until fully combined and thickened. Pour into cooled crust. Refrigerate for at least 4 hours until firm.
- For whipped cream, beat cold heavy cream and powdered sugar until stiff peaks form. Spread over chilled pie.
- Toast 1/2 cup graham cracker crumbs in a dry skillet over medium heat for 2 to 3 minutes until golden. Sprinkle over whipped cream just before serving for extra crunch. Slice and enjoy the perfect crisp crust every time.
Notes
- Pre-baking the crust for 10 minutes creates a moisture barrier to prevent sogginess. Refrigerate pie for at least 4 hours or overnight for best results. Store leftovers in the fridge for up to 3 days.


